快速构建 SpringBoot
大约 2 分钟
SpringBoot HelloWorld
功能:
浏览器发送 hello 请求,服务器接收请求并处理,响应 “hello, world!” JSON 格式的数据字符串。
1.创建 maven 工程
开发工具:idea (V2022.1.1)
步骤:
- 首先创建项目
步骤:File -> New -> Project...

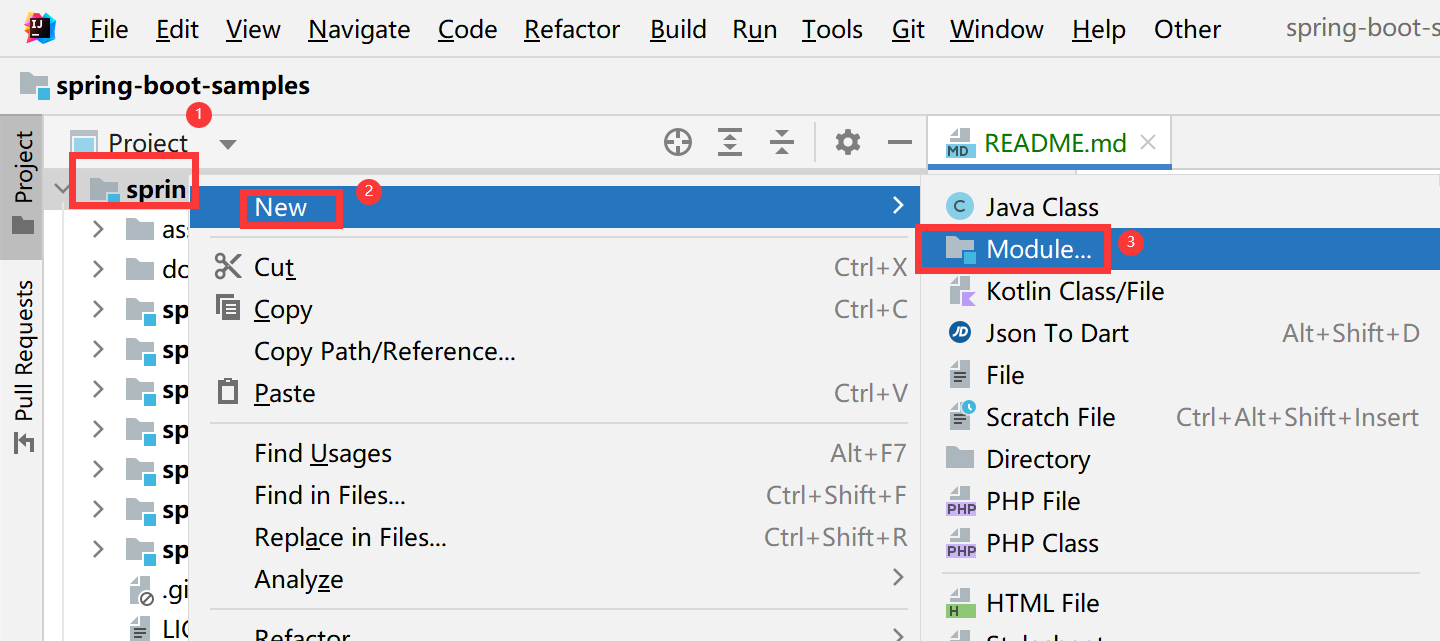
- 其次创建模块
步骤:右击已创建的项目 -> New -> Module...
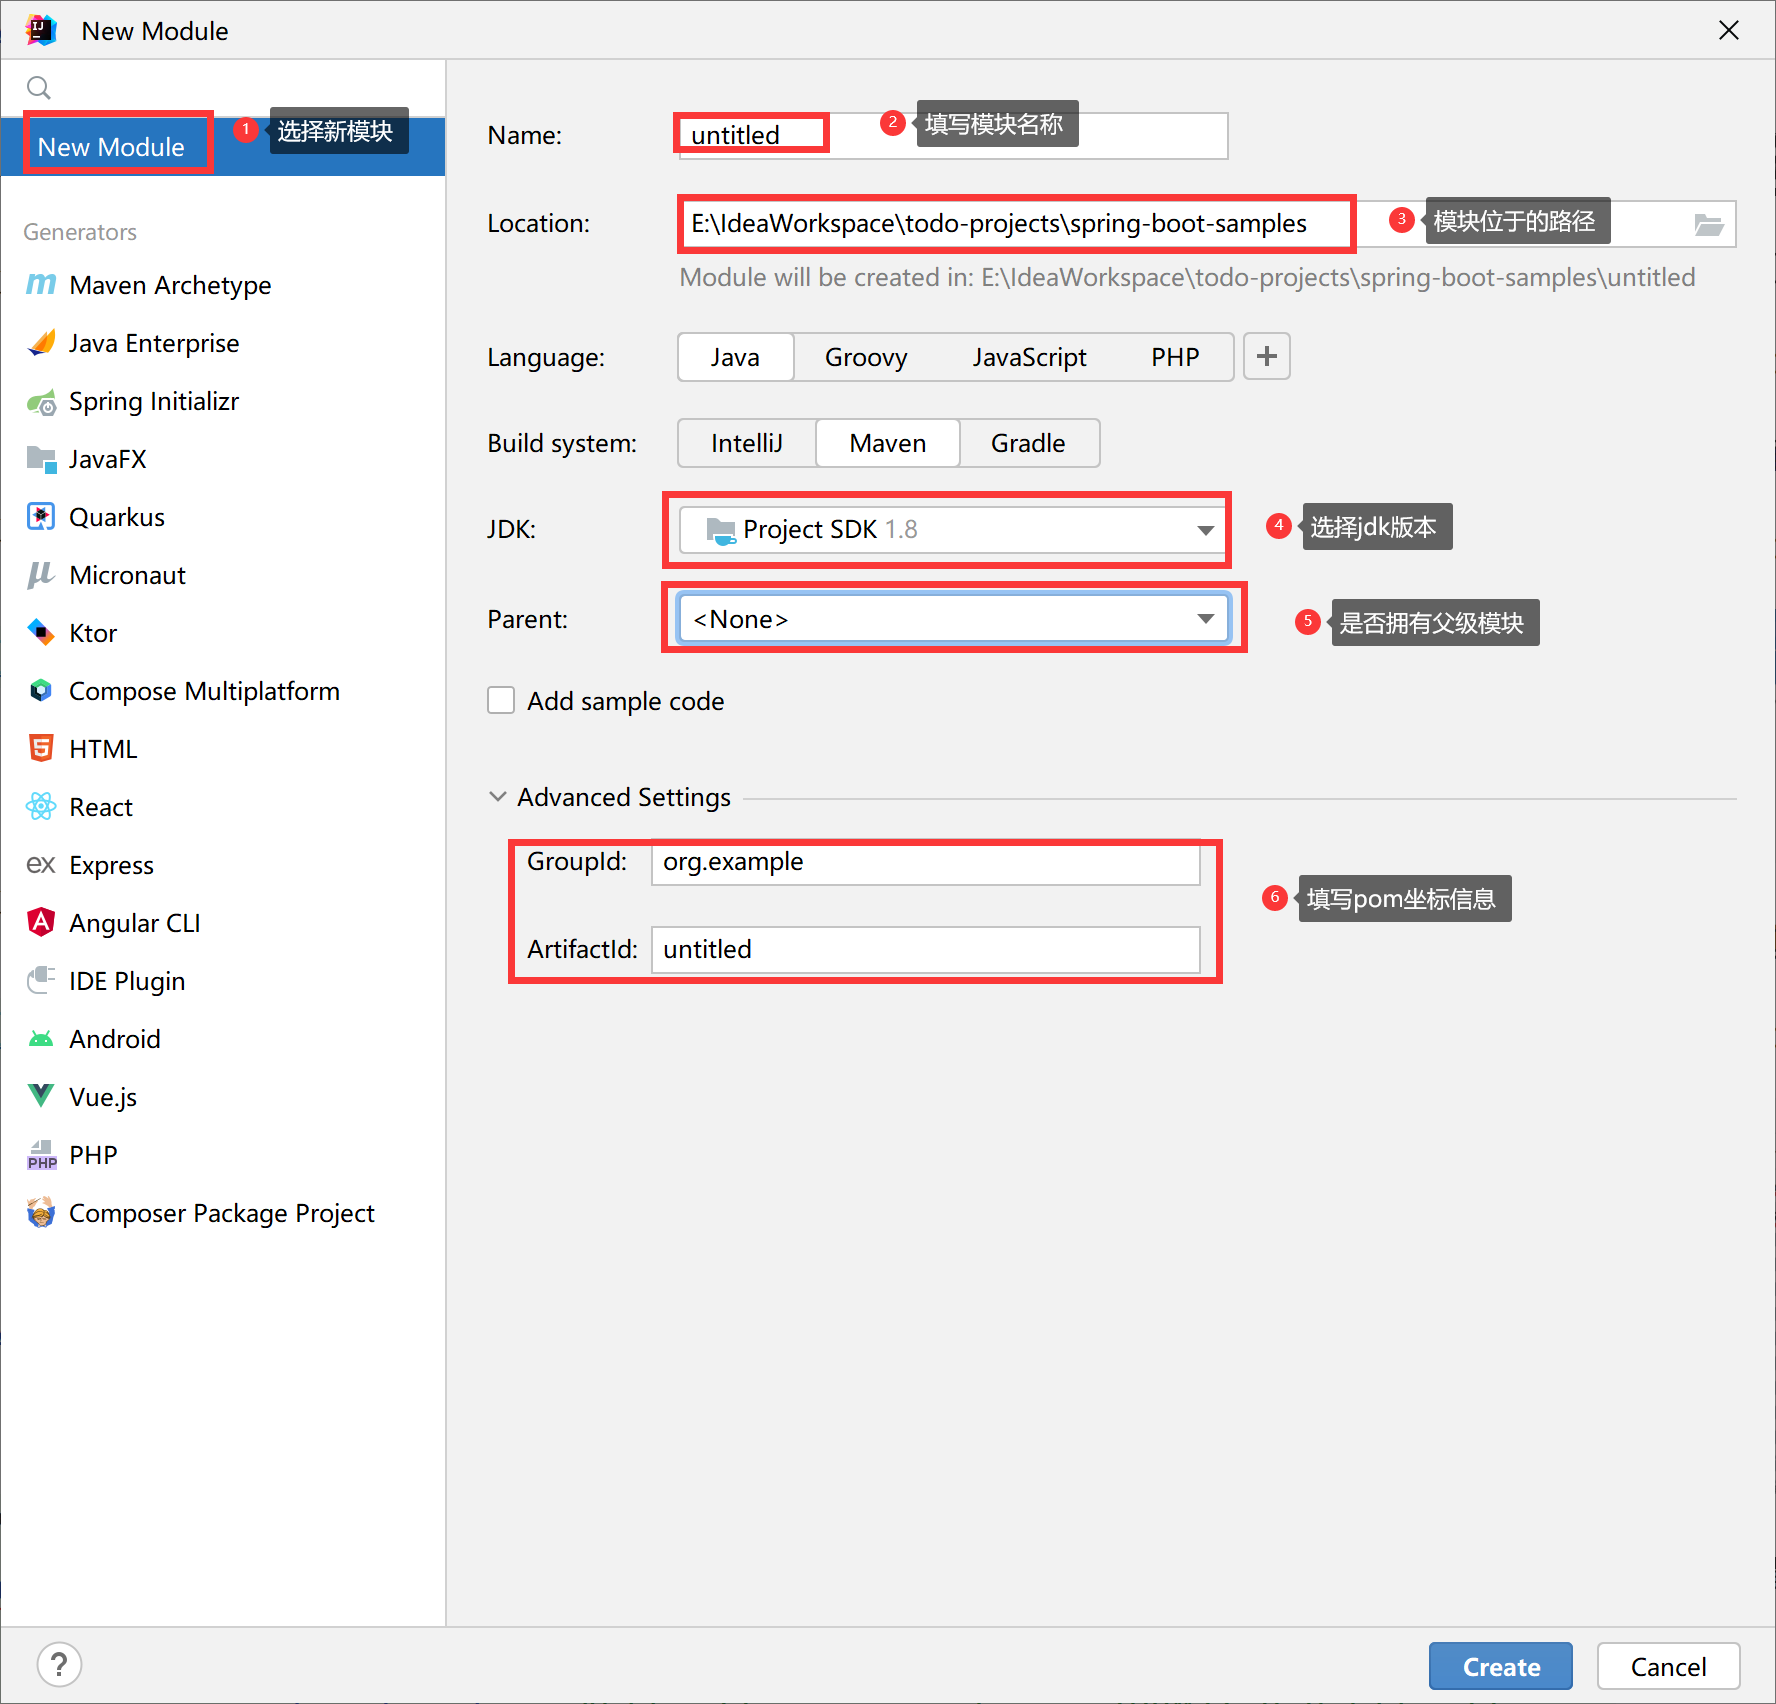
- 最后选择 New Module 类别项目
步骤:弹出框中选择 New Module -> 填写模块名称 -> 选择模块路径(默认是当前项目目录) -> 选择 JDK 版本(如果有多个版本的话) -> 是否有父级模块(首次创建模块为 None) -> 填写坐标信息
2.导入 web 依赖
<?xml version="1.0" encoding="UTF-8"?>
<project xmlns="http://maven.apache.org/POM/4.0.0"
         xmlns:xsi="http://www.w3.org/2001/XMLSchema-instance"
         xsi:schemaLocation="http://maven.apache.org/POM/4.0.0 http://maven.apache.org/xsd/maven-4.0.0.xsd">
    <!-- spring boot 父级依赖 -->
    <parent>
        <groupId>org.springframework.boot</groupId>
        <artifactId>spring‐boot‐starter‐parent</artifactId>
        <version>2.7.8</version>
    </parent>

    <dependencies>
        <dependency>
            <!-- 启动一个 SpringBoot 项目,需要引入此依赖 -->
            <groupId>org.springframework.boot</groupId>
            <artifactId>spring-boot-starter-web</artifactId>
        </dependency>
    </dependencies>
</project>
Tips:
本项目中由于进行版本统一管理,为了后面不重复引入 spring boot 相关依赖,特此在
springboot-sample-bom模块中锁定了 spring boot 的版本。
本项目采用的方式:
<?xml version="1.0" encoding="UTF-8"?>
<project xmlns="http://maven.apache.org/POM/4.0.0"
         xmlns:xsi="http://www.w3.org/2001/XMLSchema-instance"
         xsi:schemaLocation="http://maven.apache.org/POM/4.0.0 http://maven.apache.org/xsd/maven-4.0.0.xsd">
    <modelVersion>4.0.0</modelVersion>

    <properties>
        <spring.boot.version>2.7.8</spring.boot.version>
    </properties>

    <dependencyManagement>
        <dependencies>
            <dependency>
                <groupId>org.springframework.boot</groupId>
                <artifactId>spring-boot-dependencies</artifactId>
                <version>${spring.boot.version}</version>
                <type>pom</type>
                <scope>import</scope>
            </dependency>
        </dependencies>
    </dependencyManagement>

</project>
3.编写主程序并启动运行
@RestController
@SpringBootApplication
public class HelloWorldApplication {

    public static void main(String[] args) {
        SpringApplication.run(HelloWorldApplication.class, args);
    }

    @RequestMapping("/hello")
    public String hello() {
        return "hello, world!";
    }
}
说明:
- @RestController:
@Controller + @ResponseBody组合注解,标识这个类是控制器,可以提供对外访问的 restful 风格请求接口 - @SpringBootApplication:标识这个类是一个 SpringBoot 的应用程序,同时是一个主程序类
- @RequestMapping:标识这个方法(或者类)请求映射路径,例如:http://ip:port/hello,这类的
/hello就表示注释方法的映射
4.主程序测试
- 方式一:浏览器输入 http://ip:port/hello 地址,出现如下图所示表示程序运行成功!

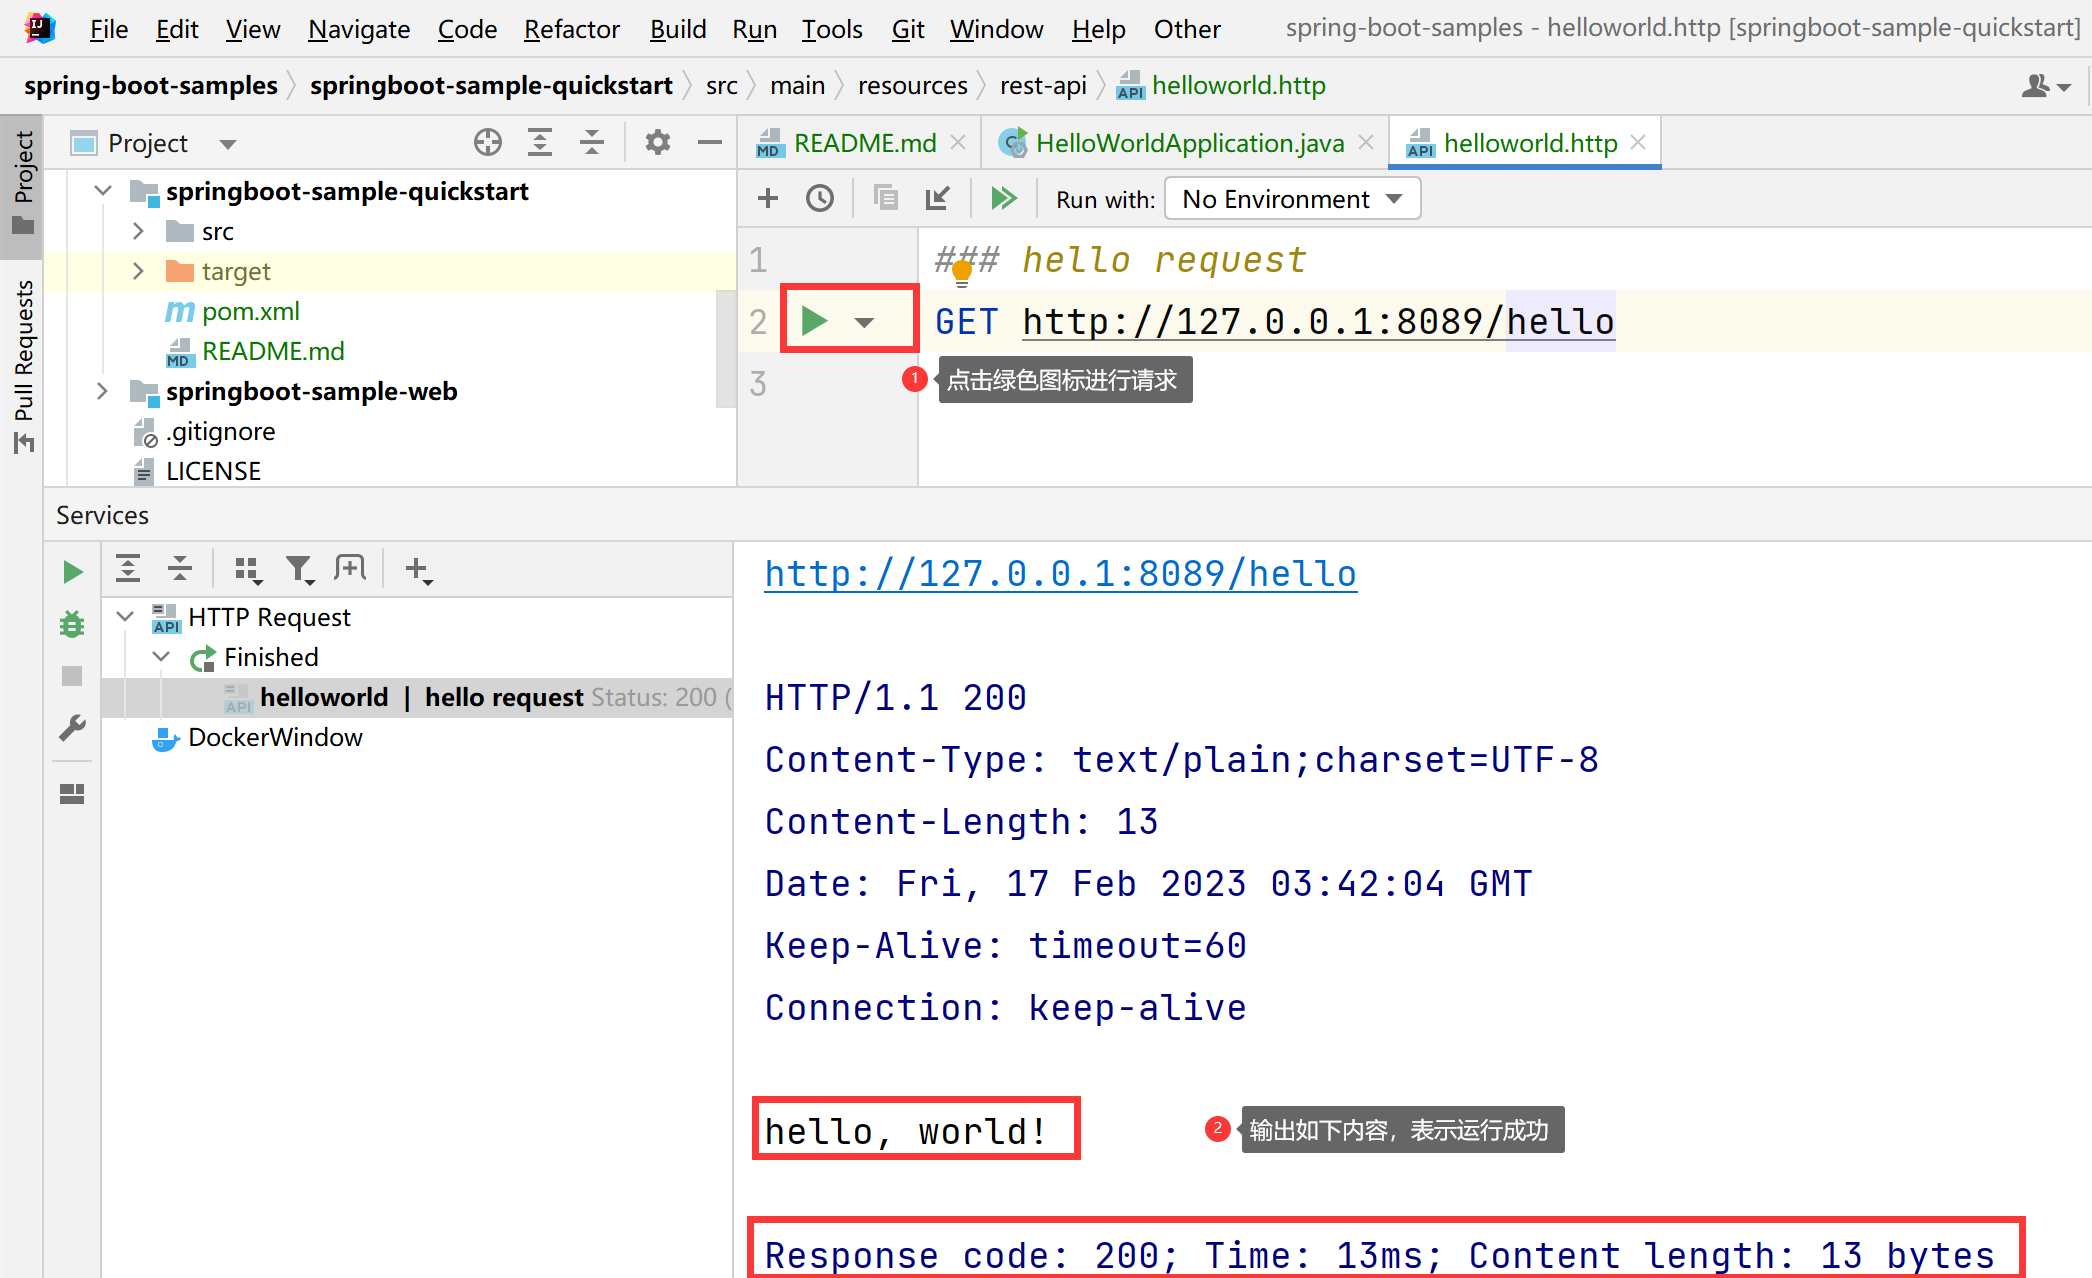
- 方式二:idea 工具中编写 helloworld.http ,内容如下:
### hello request
GET http://127.0.0.1:8089/hello
出现如下图所示表示程序运行成功!